In order to copy photos from an iOS device to another iOS device, FSharing app must be installed in both devices. Assume that you want to copy photos from an iPhone A to an iPhone B, follow the steps below:
- Open FSharing in iPhone A
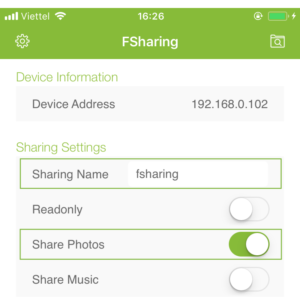
- Specify a sharing name in Sharing Name field, turn on Share Photos option then tap on Share button and wait for sharing started
- Go to iPhone B, open Browse screen then tap on Network tab
- You will see a shared drive with the name you specified in previous step (in iPhone A) appear here
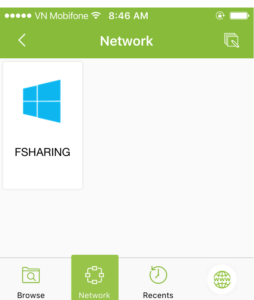
Note: If you can’t see the shared drive in the Network tab, please make sure that both devices are in the same Wi-Fi, company network or Wi-Fi hotspot. - Tap on the shared drive to connect, you will see a Photos drive there, tap on it to open
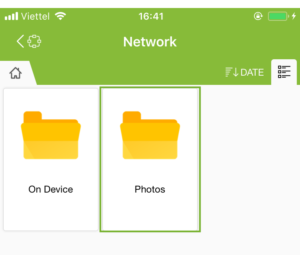
- Open the Photos drive, you will see a list of folders (they are all Photos Library albums of iPhone A)
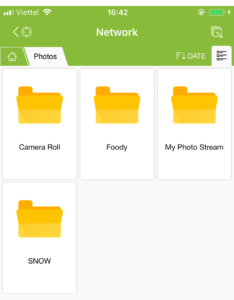
- Open any folders there, you will see all photos, tap on Edit button (on the top right of the screen) to change to edit mode
- Select any photos you want to copy then tap and hold for a few seconds you will see a context menu, select Save to Photos
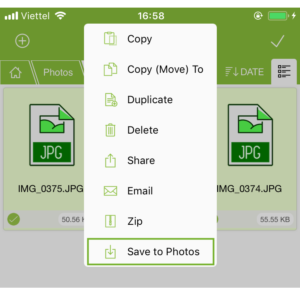
- After this action, it will copy photos from iPhone A to iPhone B’s Camera Roll
Note: You can use Copy or Copy (Move) to actions to copy photos to different albums instead Camera Roll of iPhone B
In some cases you can’t see the shared drive even both devices are in the same network, that is the broadcast is denied in the network. In this case you have to connect manually:
- Go to iPhone B, open Browse screen and select the Browse tab
- Tap on Edit button on the top right of the screen to change to edit mode then tap on Add New Drive
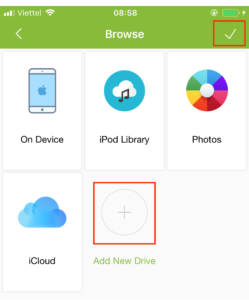
- Select Windows SMB from the popup, it will show a Windows SMB Drive form, enter fsharing (fsharing is a sharing name that specified in previous steps) in the Server field, you can enter any name in the Name field then tap on Done button
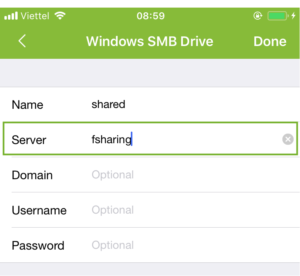
Note: If you still can’t connect, try to use device IP address, enter [Device IP Address] in the Server field (you can find the device IP address in Device Address field in previous screenshots). - Follow step 5 from previous instructions